Uploading class lists
Before a session takes place, you’ll need to get an up-to-date class list from the school and upload it to Mavis.
You can use our school class list request email template, if needed, when requesting this information from schools.
You should upload class lists at least 3 weeks before the session date, as this is when Mavis sends consent requests to parents.
Uploading class lists:
- adds parent contact details for children in the session, which Mavis uses to send consent requests
- identifies children who have moved in our out of the school since you uploaded the cohort
Make sure you upload class lists separately for each school. Each school can only have one class list.
Before uploading a class list, read:
How to upload a class list
You can use this template:
If the school did not provide the list in CSV format, you need to reformat it ready for upload:
- Navigate to the relevant Excel file for the school and open it. If there are multiple tabs in the Excel sheet, the records need to be combined into a single table.
- If present, remove the helper text row from the table (row 2).
- Go to File > Save a copy and then choose the format CSV UTF-8 (Comma delimited) (.csv) and save it.
In Mavis:
- Go to the Imports tab.
- Select Upload records.
- Select Class list records then Continue.
- Search for the school by name and select Continue.
- Select which year groups these records are for.
- Select Choose File, then select the CSV file you want to upload.
- Select Continue. If there are any validation issues, Mavis will not upload the file. Correct the issues listed in the file and try again.
- Wait for the file to finish uploading.
Mavis may add a missing NHS number or replace an incorrect one in your upload by searching PDS. (See See how Mavis uses PDS to find NHS numbers)
If a school does not provide postcodes for every child, you can still upload the class list. You will have to add any missing NHS numbers manually.
Upload errors
If your upload fails, see Upload errors.
Reviewing and approving uploads
After the file has uploaded, you must review and approve it before the records are imported into Mavis.
Select the upload date and time to open the review page.
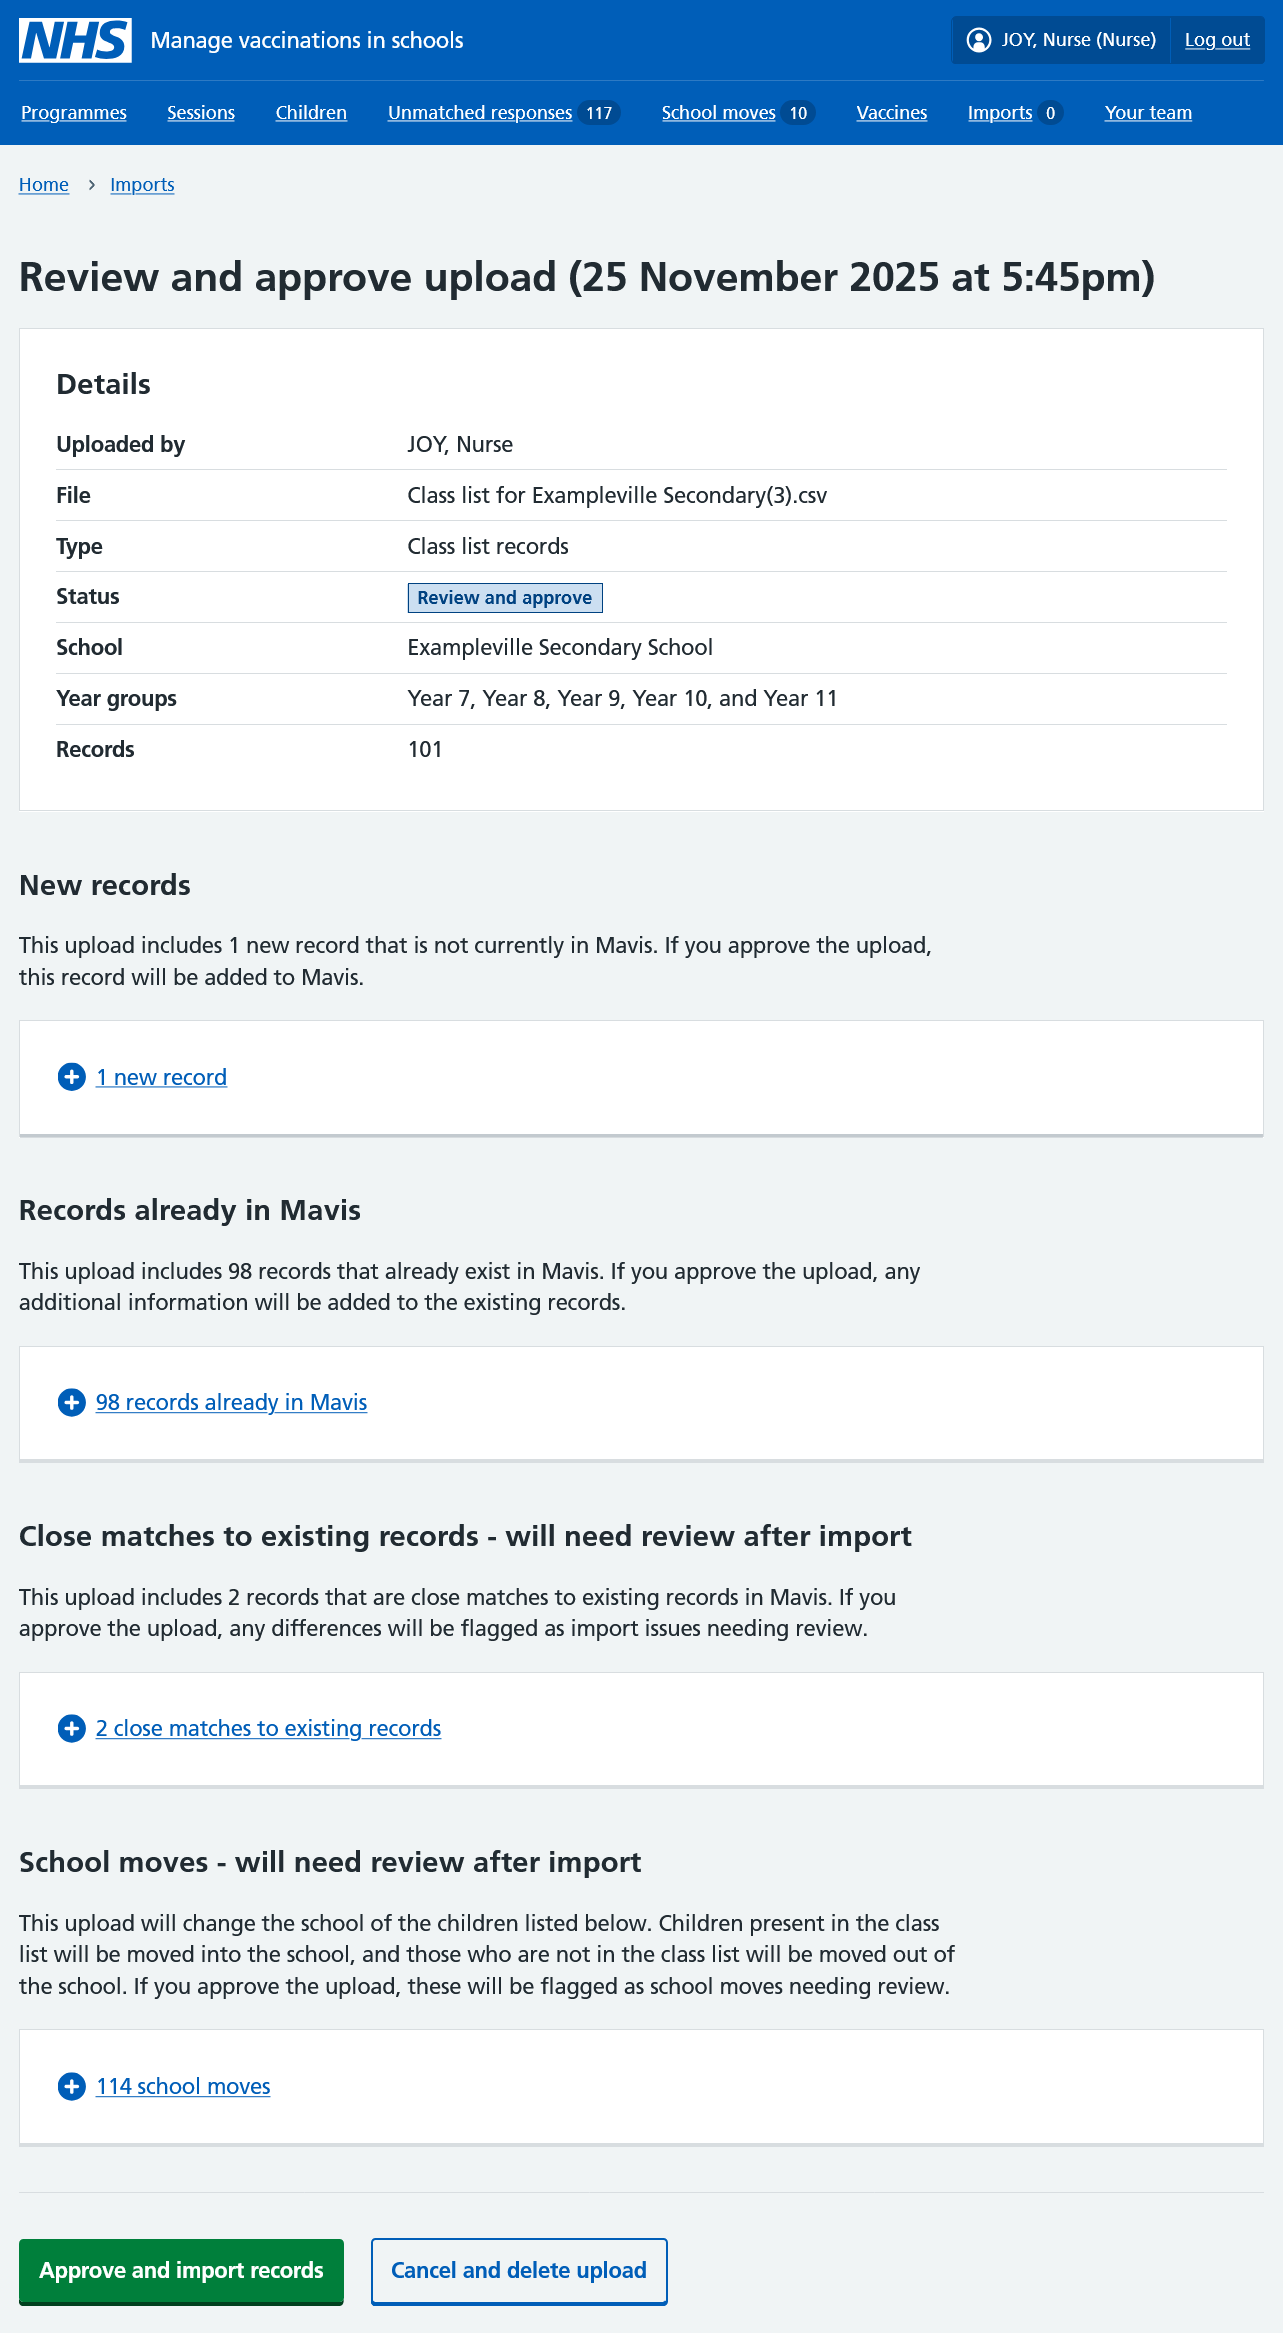
Records already in Mavis (no action needed)
When you upload class lists, Mavis identiies children it already has records for.
If it’s an exact duplicate, Mavis will simply not import the record again - you’ll see a notification telling you how many records were not imported because they already exist in Mavis.
If the file upload includes additional information for the child, such as their gender or preferred name, this will be added to the existing record if you approve the upload.
Close matches to existing records (resolve after import)
If Mavis identifies any close matches to existing child records, you will need to review the missing or conflicting details after approving the upload, and confirm which record to keep and which record to archive.
School moves (resolve after import)
If the upload includes children who already have a record in Mavis for a different school, Mavis flags this as a school move. Mavis also flags when a child moves to a school in your area from a school outside your area.
If you approve the upload, you must confirm the child’s school in the School moves area of Mavis.
Find out how to review and resolve school moves.
Approving the upload (and further reviews)
To approve the upload and import the records into Mavis, select Approve and import records.
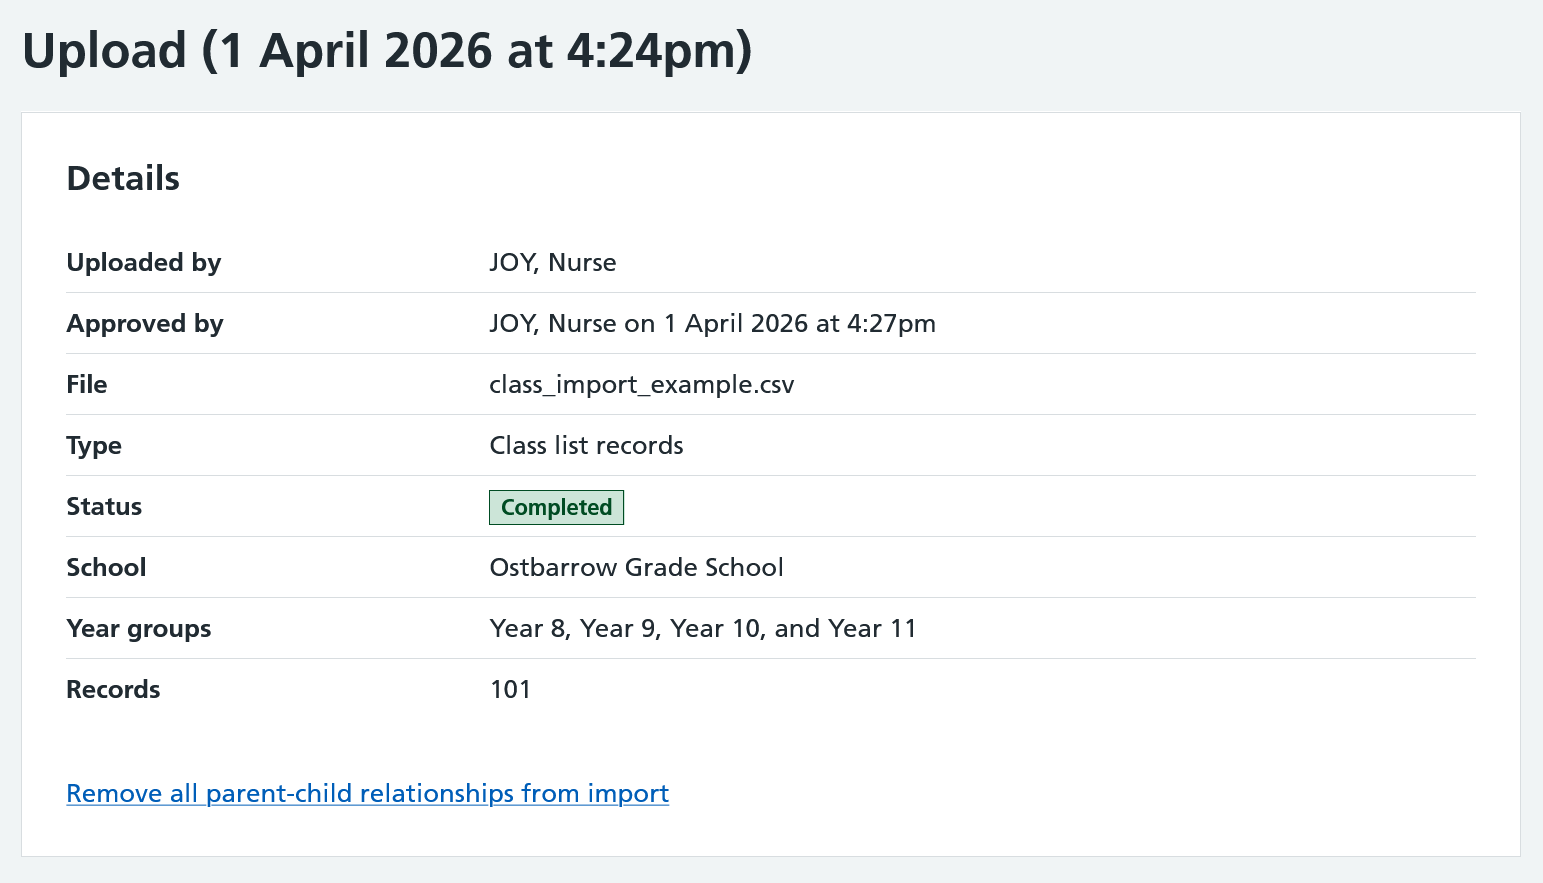
Once a file upload has been approved and imported into Mavis, it will no longer be visible in the Incomplete uploads list. It will now be in the Completed imports list. You can find it by selecting the Completed imports tab.
In some cases, you will need to do a further review. This happens if one or more records have changed since you uploaded the file.
For example, another import may have been approved that includes some of the same records, or a child’s school or NHS number may have changed in Mavis.
Review the changed records and confirm whether you still want to import them.
Resolving close matches
Mavis highlights any potential duplicates as close matches to existing records, which you must resolve after import.
- On the Imports screen, select the Completed imports tab.
- Select the date and time of the upload to view its details.
- Under ‘Close matches to existing records - needs review’, select the upload issues link to see a list of close matches.
- Select Review for each record listed.
- Select which version of the record you want to keep then select Resolve duplicate.
You can also choose to keep both child records. For example, Mavis may identify twins as a close match. If this happens, select Keep both records.
If each record contains some correct information:
- Note any correct information from the record you are not keeping.
- Go to the record you are keeping and edit the information there.
You can view all unresolved close matches in the Issues tab on the Imports screen. This lists outstanding close matches from all uploads.
Handling out-of-year-group children
When children are taught outside their chronological year group, you need to record this in either the cohort upload or class list upload. If you do not do this, the child won’t be added to the correct cohort.
For example, for a child who would be educated in year 7 according to their birth date, but is in year 8 at school, you need to specify a value of 8 in the CHILD_YEAR_GROUP field in either the cohort upload file or class list upload file.
Removing incorrect parent-child relationships from the import
If you import a class list and later find that the parent-child relationships are incorrect, you can remove those relationships from Mavis.
For example, you might need to do this if the parent details in your CSV file are not lined up with the right children. You can then:
- remove the parent-child relationships from Mavis
- correct the CSV file
- re-upload the file
Removing a parent-child relationship from Mavis will invalidate any consent responses the parent has given for that child. You can choose to only remove relationships where no consent response has been given.
- Go to Imports and select the Completed imports tab.
- Select the relevant import to view its details.
- At the bottom of the details, select Remove all parent-child relationships from import.
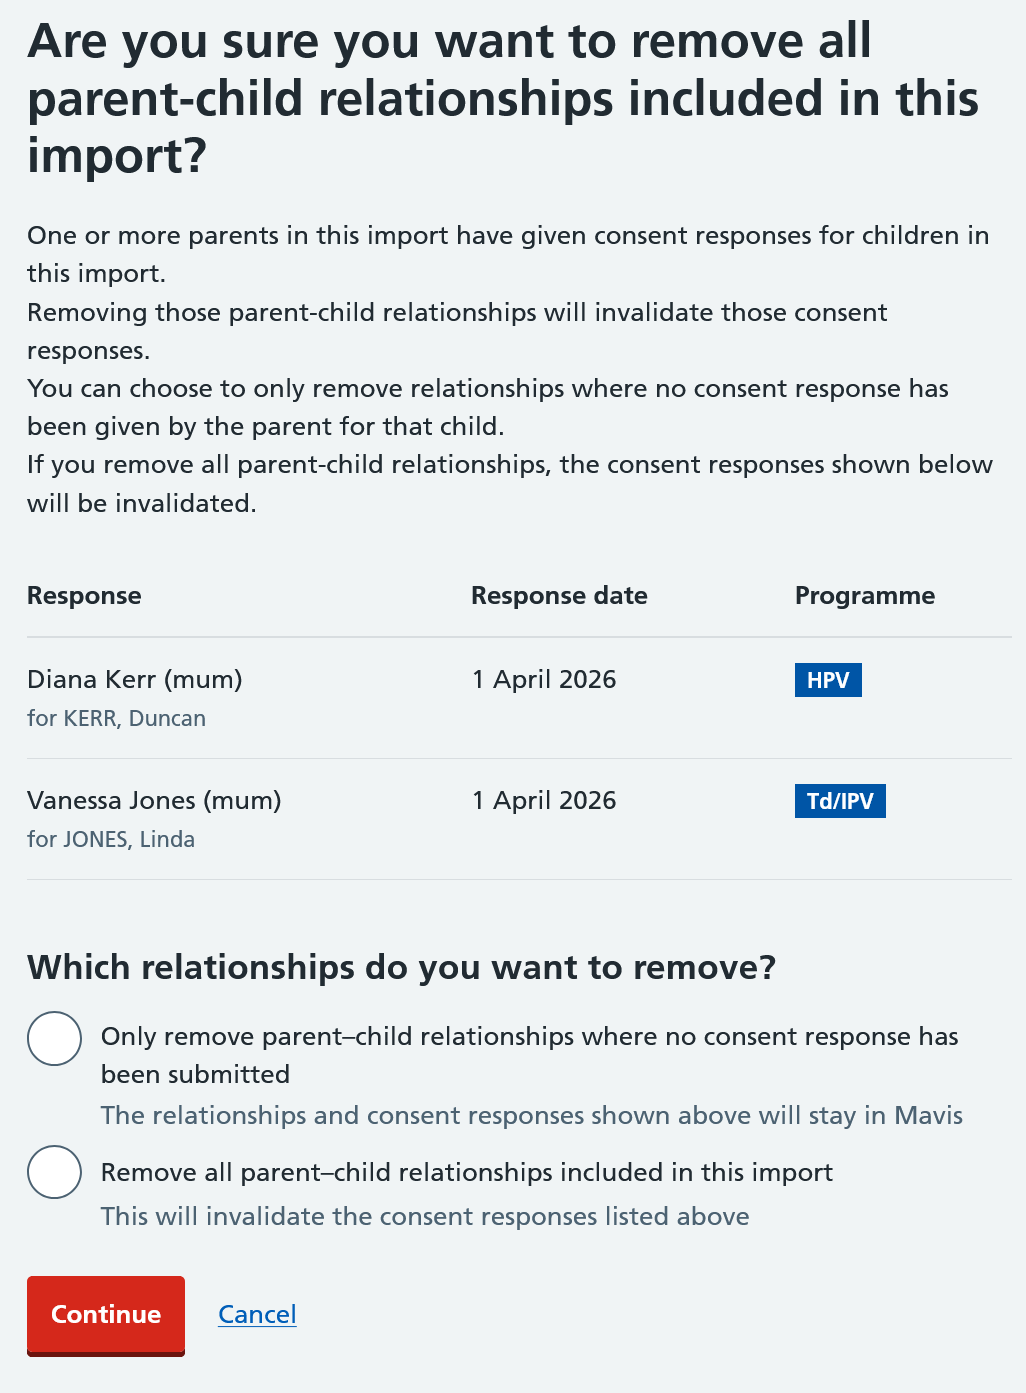
- When asked “Are you sure you want to remove all parent-child relationships included in this import”, select Continue to confirm, or Cancel to stop.
If parents have given consent responses
If any parents in the import have submitted a consent response for any children in the import, you can choose to leave those parent-child relationships in place, if you know they are correct.
- Follow steps 1 to 3 described above.
- Mavis will tell you that one or more parents in the import have submitted consent responses for children in the import. It will also show the full consent details.
- Choose one of the following options:
- Only remove parent–child relationships where no consent response has been submitted
The relationships and consent responses shown above will stay in Mavis - Remove all parent–child relationships included in this import
This will invalidate the consent responses listed above
- Only remove parent–child relationships where no consent response has been submitted
Select Continue to confirm, or Cancel to stop.